
Page 307 - Katalog náhradních dílu a komponent pro všeobecnou údržbu 2015|16
P. 307
Těsnění pístnice
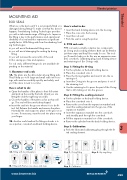
MOUNTING AID
ROD SEALS
What use is the best seal if it is not properly fitted or is damaged during fitting? To make sure that this doesn’t happen, Freudenberg Sealing Technologies provides you with a tailor-made range of fitting tools. Impecca- ble fitting is key to the performance and operational durability of a seal and thus represents a significant quality factor. With fitting aids from Freudenberg Seal- ing Technologies:
■ you will avoid fundamental fitting errors
■ you will avoid damaging the sealing lip during
fitting
■ you will increase the service life of the seal
■ thus saving you time and expense.
For rod seals, different fitting tools are available de- pending on the material.
1. Elastomer rod seals
1A. The pliers are the all-rounder among fitting aids. They’ll help you to fit large and small seals into hous- ings with axial accessibility quickly and safely, and you’ll be done in next to no time.
Here’s what to do:
■ Open the handles of the pliers to their full extent and pick up the seal by the bolts (check you are fitting the seal the right way around!).
■ Close the handles of the pliers as far as they will go. The seal will become kidney-shaped.
■ Insert the seal into the groove where it is to be fit- ted. AA Release the handle and remove the pliers. Normally the seal snaps into place in the groove on its own. If necessary, ease the seal into place using your finger.
1B. Another useful method for fitting rod seals is to use a pusher, cone-bush and back holding device.
1A. Fitting with mounting pliers
1B. Fitting with Pusher, cone sleeve and stops www.brammer.biz
Here’s what to do:
• Insert the back holding device into the housing. • Place the cone onto the housing.
• Insert the rod seal.
• Push the seal in using the pusher.
2. PTFE rod seals
PTFE rod seals normally comprise two components: an O-ring and a sealing element. Both can be fitted in just three steps and they’ll be ready for use. The tools you’ll need to help you do this are an expansion man- drel, cone-bush, calibrating plug, back holding device and retaining tool (for O-rings only).
Step 1: Fitting the O-ring
■ Fix the cylinder on the back holding device.
■ Place the cone-bush onto it.
■ Press the O-ring together and insert it into the re-
taining tool.
■ Insert the O-ring into the groove and press it out of
the retaining tool.
■ Use the retaining tool to press the part of the O-ring
that is still sticking out into the groove.
Step 2: Fitting the sealing element
■ Fix the cylinder on the back holding device.
■ Place the cone-bush onto it.
■ Remove the cone from the expansion mandrel and
insert the sealing element into the groove of the
expansion mandrel.
■ Insert the expansion mandrel into the cone-bush
and steadily push through the cone-bush.
■ Pull the expansion mandrel out of the cone-bush.
■ Remove the cylinder from the back holding device.
Step 3: Calibration
■ Push the lubricated calibrating plug through the fit- ted sealing element.
3
Těsnění
Step 1. O-ring fitting
Step 3. Calibration
Step 2. Slip ring fitting
295
